The dough hook attachment is a vital tool for any home baker looking to make delicious bread at home. This attachment is typically used with a stand mixer and is designed to knead and mix bread dough efficiently. The dough hook attachment features a unique spiral design that mimics the kneading action of hand kneading, making it an essential tool for those who want to save time and effort in the bread-making process. The spiral design of the dough hook attachment allows it to gently knead and stretch the dough, developing the gluten and creating a smooth, elastic texture. This is crucial for achieving the perfect crumb structure and texture in your homemade bread.
When using the dough hook attachment, it’s important to start at a low speed to gradually incorporate the ingredients and prevent flour from flying out of the mixing bowl. As the dough comes together, you can increase the speed to ensure thorough kneading. It’s essential to monitor the dough’s progress and adjust the speed as needed to achieve the desired texture. The dough hook attachment is a versatile tool that can be used for various types of bread, from soft sandwich loaves to rustic artisan bread. Understanding how to use this attachment properly is key to mastering the art of bread making at home.
Key Takeaways
- The dough hook attachment is a versatile tool for mixing and kneading bread dough in a stand mixer.
- Choosing the right flour, such as bread flour or all-purpose flour, is crucial for achieving the desired texture and structure in bread making.
- Kneading techniques with the dough hook involve mixing at low speed to combine ingredients and then increasing to medium speed for kneading.
- Perfect proofing and rising of bread dough can be achieved by controlling temperature, humidity, and time.
- Incorporating flavors and add-ins like herbs, cheese, or nuts can enhance the taste and texture of homemade bread.
- Troubleshooting common bread making issues such as dense texture, lack of rise, or uneven baking can be addressed with adjustments in ingredients, technique, or equipment.
- Mastering different bread shapes and styles, from baguettes to braided loaves, adds variety and creativity to homemade bread baking.
Choosing the Right Flour for Bread Making
Selecting the right flour is crucial for successful bread making. Different types of flour have varying protein content, which directly impacts the structure and texture of the bread. Bread flour, with its high protein content, is ideal for making yeast bread as it provides the necessary strength and elasticity for a good rise and crumb structure. All-purpose flour can also be used for bread making, but it may result in a slightly softer texture compared to bread flour. Whole wheat flour, on the other hand, adds a nutty flavor and hearty texture to bread, making it a popular choice for whole grain loaves.
When choosing flour for bread making, it’s important to consider the type of bread you want to bake and the desired texture. Experimenting with different types of flour can lead to unique and delicious results, so don’t be afraid to try new varieties in your bread recipes. Additionally, using high-quality flour from reputable brands can make a significant difference in the flavor and texture of your homemade bread. Understanding the characteristics of different flours and how they contribute to the overall quality of your bread is essential for any home baker looking to perfect their bread-making skills.
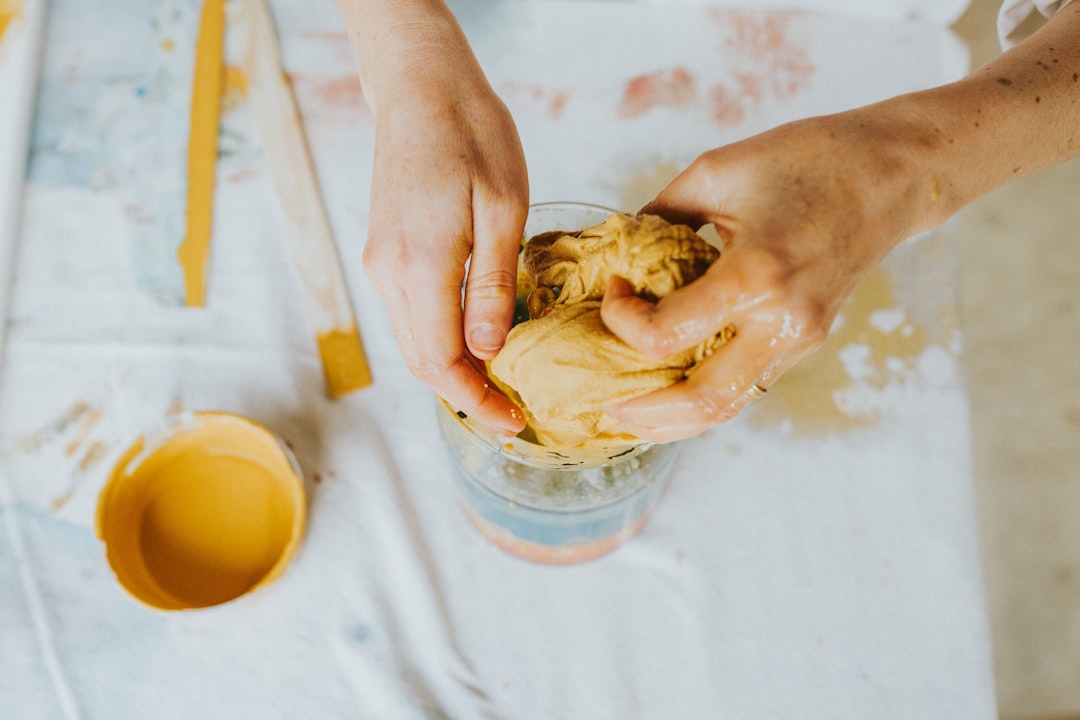
Kneading Techniques with the Dough Hook
Kneading is a crucial step in bread making that develops the gluten in the dough, creating a strong and elastic structure. When using the dough hook attachment, it’s important to knead the dough until it reaches the desired consistency. This typically involves mixing the ingredients on low speed until a shaggy dough forms, then increasing the speed to knead the dough until it becomes smooth and elastic. It’s essential to monitor the dough’s progress and make adjustments as needed to achieve the perfect texture.
One technique for kneading with the dough hook is to periodically stop the mixer and scrape down the sides of the bowl to ensure even mixing and kneading. This helps incorporate any stray bits of flour or ingredients that may not have been fully mixed into the dough. Another technique is to periodically check the dough’s elasticity by performing the windowpane test. This involves stretching a small piece of dough between your fingers to see if it forms a thin, translucent membrane without tearing. Mastering these kneading techniques with the dough hook attachment is key to achieving consistent and professional-quality results in your homemade bread.
Tips for Perfect Proofing and Rising
| Tip | Description |
|---|---|
| Use fresh yeast | Ensure that the yeast you use is fresh to help with proper rising |
| Check the temperature | Make sure the dough is proofed in a warm environment for optimal rising |
| Allow enough time | Give the dough sufficient time to proof and rise before baking |
| Use the poke test | Check the dough’s readiness for baking by gently poking it with your finger |
| Use a clean towel | Cover the dough with a clean towel during proofing to prevent drying out |
Proper proofing and rising are essential steps in bread making that directly impact the texture, flavor, and structure of the finished loaf. Proofing refers to the final rise of the shaped dough before baking, while rising refers to the initial fermentation period after kneading. To ensure perfect proofing and rising, it’s important to create an ideal environment for the yeast to thrive. This includes maintaining a warm, draft-free space for the dough to rise, as well as allowing enough time for fermentation.
One tip for perfect proofing and rising is to cover the dough with a clean kitchen towel or plastic wrap to prevent it from drying out during the process. This helps create a humid environment that promotes yeast activity and prevents a dry crust from forming on the surface of the dough. Additionally, allowing the dough to rise until it has doubled in size is a good indicator that it’s ready for shaping and baking. Understanding how to properly proof and rise your bread dough is essential for achieving light, airy loaves with a good crumb structure and flavor.
Incorporating Flavors and Add-Ins
Adding flavors and add-ins to your bread can elevate its taste and texture, creating unique and delicious variations. From herbs and spices to nuts, seeds, and dried fruits, there are countless ways to customize your homemade bread recipes. When incorporating flavors and add-ins, it’s important to consider how they will affect the overall texture and structure of the bread. For example, adding too many moist ingredients like fresh fruits or vegetables can result in a dense or soggy loaf, while incorporating crunchy nuts or seeds can add texture and visual interest.
One approach to incorporating flavors and add-ins is to fold them into the dough during the final stages of kneading, ensuring even distribution throughout the loaf. Another technique is to create swirls or layers of flavor by rolling out the dough, sprinkling it with desired ingredients, then rolling it up into a tight spiral before shaping and baking. Experimenting with different flavors and add-ins can lead to exciting new creations that showcase your creativity and personal taste preferences in your homemade bread.
Troubleshooting Common Bread Making Issues

Bread making can be a rewarding but sometimes challenging endeavor, especially when faced with common issues such as dense or underproofed loaves, uneven rising, or overbaked crusts. Understanding how to troubleshoot these issues is essential for improving your bread-making skills and achieving consistent results. One common issue is dense or heavy loaves, which can be caused by using too much flour or not allowing enough time for proper rising and fermentation. To troubleshoot this issue, try adjusting your recipe’s flour-to-liquid ratio or allowing more time for proofing.
Another common issue is an overbaked crust, which can result from baking at too high a temperature or for too long. To troubleshoot this issue, try reducing the baking temperature or covering the loaf with aluminum foil halfway through baking to prevent further browning. Uneven rising can also be a common problem, often caused by uneven shaping or improper proofing conditions. To troubleshoot this issue, try shaping your loaves more evenly or ensuring a consistent proofing environment for all your breads. By understanding how to troubleshoot common bread making issues, you can overcome challenges and improve your skills as a home baker.
Mastering Different Bread Shapes and Styles
Mastering different bread shapes and styles allows you to showcase your creativity and add visual interest to your homemade loaves. From classic sandwich loaves to rustic boules, braided challah, or decorative rolls, there are countless shapes and styles to explore in bread making. Each shape requires different techniques for shaping and scoring, as well as varying proofing times and baking temperatures.
One approach to mastering different bread shapes and styles is to practice shaping techniques with small batches of dough until you feel comfortable with each style. This allows you to experiment with different designs and get a feel for how each shape affects the final appearance and texture of the loaf. Additionally, studying recipes and tutorials for different bread shapes can provide valuable insights into shaping techniques and best practices for achieving professional-looking results.
In conclusion, understanding how to use the dough hook attachment, choosing the right flour for bread making, mastering kneading techniques, perfecting proofing and rising, incorporating flavors and add-ins, troubleshooting common issues, and mastering different bread shapes and styles are all essential skills for any home baker looking to elevate their bread-making abilities. With practice and experimentation, you can develop your own signature bread recipes that showcase your creativity and passion for baking. Whether you prefer classic loaves or artisanal creations, there’s always something new to learn in the art of bread making.
Looking for some delicious recipes to try with your new dough hook? Check out this article on Kosher Flyaway for some mouthwatering kosher dishes that you can easily make using your dough hook. From challah bread to babka and more, you’ll find plenty of inspiration to put your new kitchen tool to good use. Kosher Flyaway offers a variety of recipes and tips for creating delectable kosher meals, making it a great resource for anyone looking to expand their culinary skills.
FAQs
What is a dough hook?
A dough hook is a kitchen tool used for mixing and kneading dough. It is typically attached to a stand mixer or hand mixer.
How does a dough hook work?
The dough hook works by rotating and stretching the dough, allowing it to be thoroughly mixed and kneaded without the need for manual effort.
What are the benefits of using a dough hook?
Using a dough hook can save time and effort when making bread, pizza dough, or other types of dough. It ensures thorough mixing and kneading, resulting in a consistent and well-developed dough.
Can a dough hook be used for other purposes besides dough?
While the primary purpose of a dough hook is for mixing and kneading dough, it can also be used for mixing other heavy ingredients such as certain types of batter or even meat mixtures.
How do you clean a dough hook?
To clean a dough hook, it is best to remove it from the mixer and wash it with warm, soapy water. Some dough hooks may also be dishwasher safe. It’s important to thoroughly dry the dough hook after cleaning to prevent rusting.